Azure is often the first real answer to "what if something happens to my computer": instead of keeping everything on one machine, you store and run it on infrastructure Microsoft owns and maintains, reachable from anywhere with a connection. It's more than storage too, virtual machines, web apps, databases, and a lot more all run on the same platform. This walkthrough covers the most hands-on version of that idea: standing up an actual virtual machine from scratch.
Step 1: Create a resource group
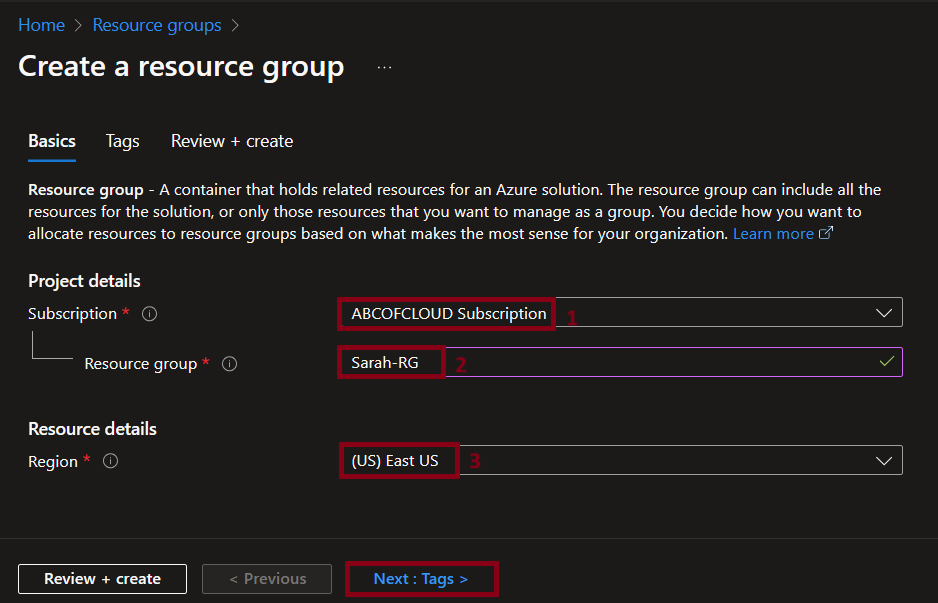
A resource group is the logical container everything else lives inside, the VM, its network, its disks, all grouped so they can be managed, updated, and deleted together. Creating one just means picking a subscription, giving it a name, and choosing a region.
Step 2: Create a virtual network
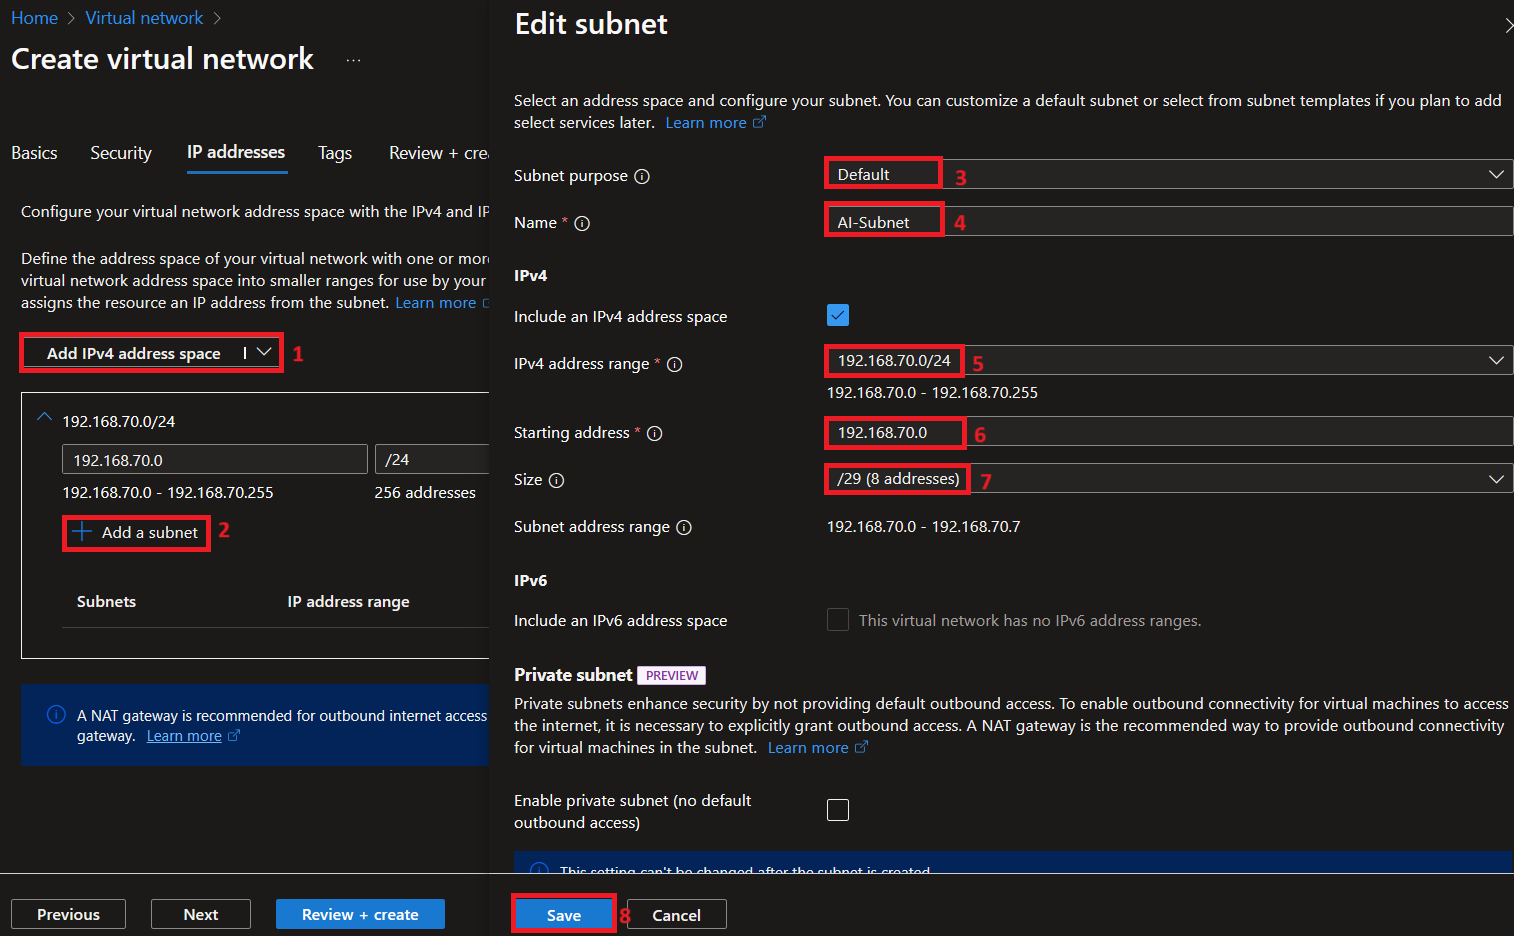
A virtual network is a private, segmented space inside Azure, the cloud equivalent of the network you'd run in your own building. Getting comfortable with CIDR notation and subnetting pays off here: a /24 address space gives 256 addresses, and carving that down to a /29 gives a tighter range of 8, enough for a small subnet without wasting the rest of the space.
For this VM, I split one address space into two subnets, an AI-Subnet and a Project-Subnet, each sized to what it actually needed.
Step 3: Create the virtual machine
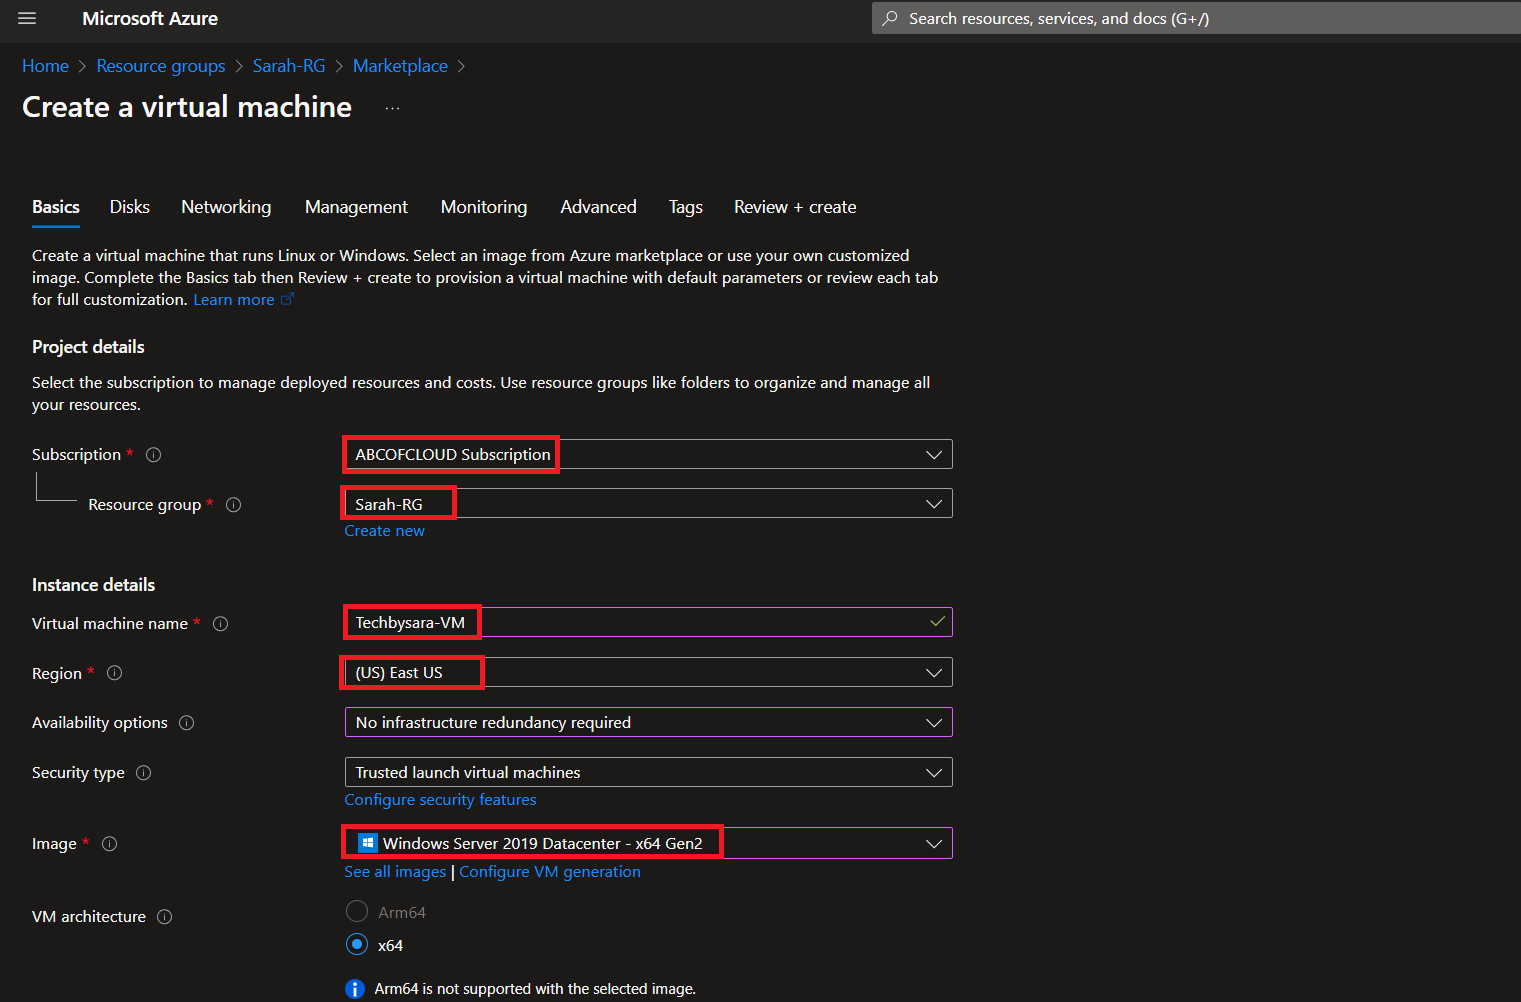
With the network in place, the VM itself comes together on one form: subscription, resource group, a name, a region, a security type (Trusted launch, in this case), and the OS image, Windows Server 2019 Datacenter. Size determines how much CPU and memory the VM gets; I went with a Standard_B2ms, 2 vCPUs and 8 GiB of memory, enough for the workload this VM needed to run.
The administrator account needs a username and a password meeting Azure's complexity requirements, and the inbound port rules need RDP (port 3389) open if you want to connect to it remotely afterwards. On the Networking tab, the VM gets attached to the virtual network and subnet created earlier, along with a new public IP.
Testing it
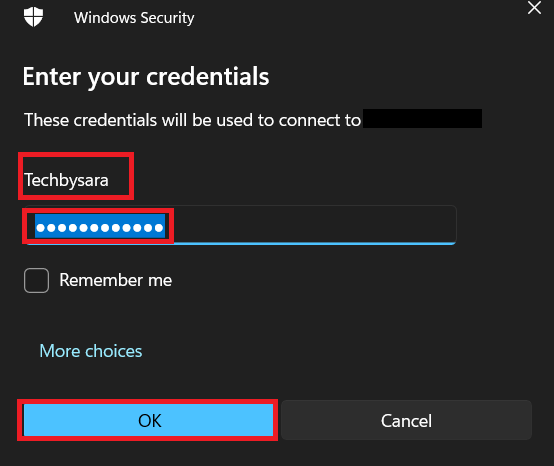
Once the deployment finishes, connecting is a matter of downloading the RDP file from the VM's Connect page and opening it. Windows will warn that the publisher can't be identified, which is expected for a fresh connection like this, then prompt for the username and password set during creation.
From there it's a normal Windows Server desktop, provisioned, networked, and reachable, built from nothing in three steps.
That's the whole flow: resource group, network, machine, connect. If you want every click and field along the way, I put together the complete guide as a PDF.