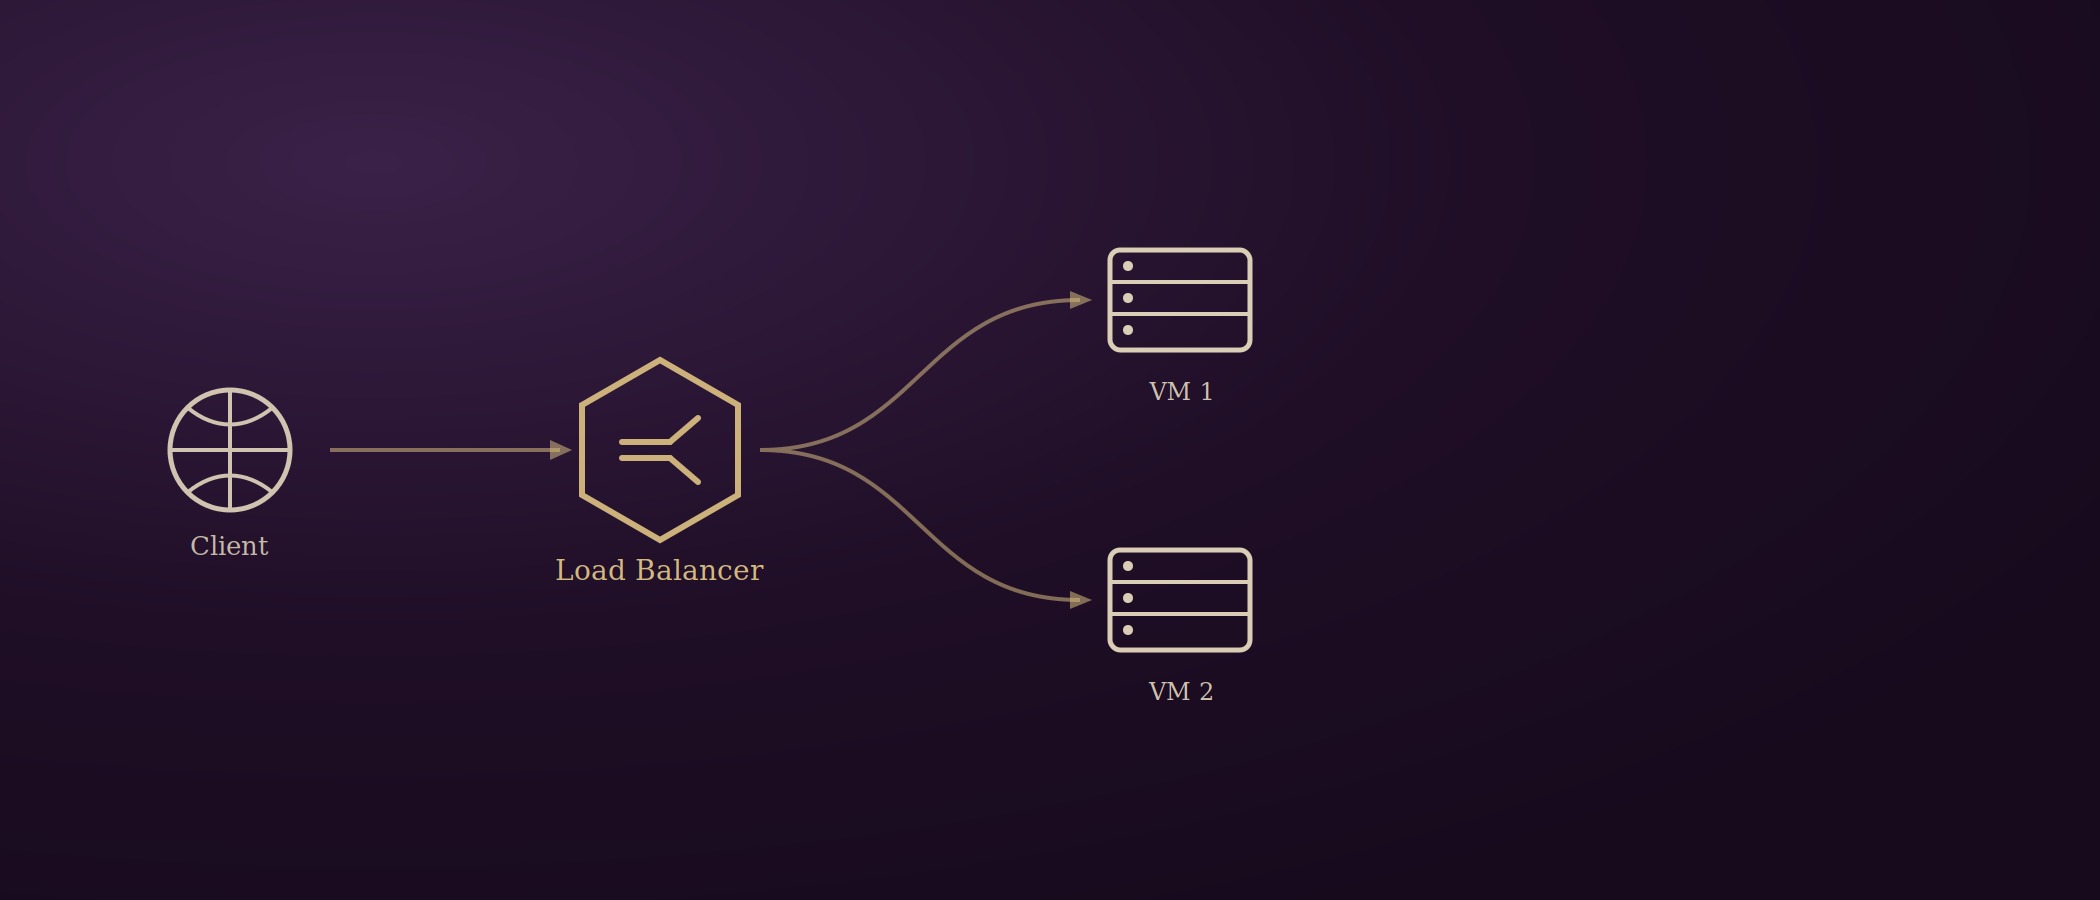
High availability and fault tolerance are foundational requirements for production cloud workloads. In this hands-on tutorial, I walk through the architecture and step-by-step configuration of an Azure Public Load Balancer (Layer 4) to distribute traffic across redundant Windows Server virtual machines in an Availability Set.
What's covered:
- Setting up VNets, subnets and Network Security Groups (NSGs)
- Automated IIS web server configuration via PowerShell
- Configuring frontend IPs, backend pools and TCP health probes
- Setting up inbound NAT rules for isolated RDP management without exposing public IPs on each VM
Why this matters
Azure Load Balancer distributes incoming network traffic across a group of backend VMs or VM scale sets to keep an application available. It works at Layer 4 of the OSI model and acts as a single point of contact for clients, which means:
- High availability. If one VM fails, traffic routes to the healthy one.
- Scalability. Workloads get balanced automatically during periods of high demand.
- Performance. Resource utilization stays optimized across the backend pool.
There are two flavors. A Public Load Balancer provides both inbound and outbound connectivity, routing internet traffic to your VMs and translating private IPs to public ones for outbound connections. An Internal Load Balancer does the same job but stays inside a private virtual network. This walkthrough uses the public kind.
Step 1: Prepare the environment
Before touching the load balancer itself, the groundwork needs to be in place:
- A resource group to hold everything
- A virtual network and subnet
- A public IP address
- A Network Security Group allowing inbound RDP (port 3389, locked to my own IP) and HTTP (port 80), associated to the shared subnet
- An Availability Set, with both VMs added to it for fault domain separation
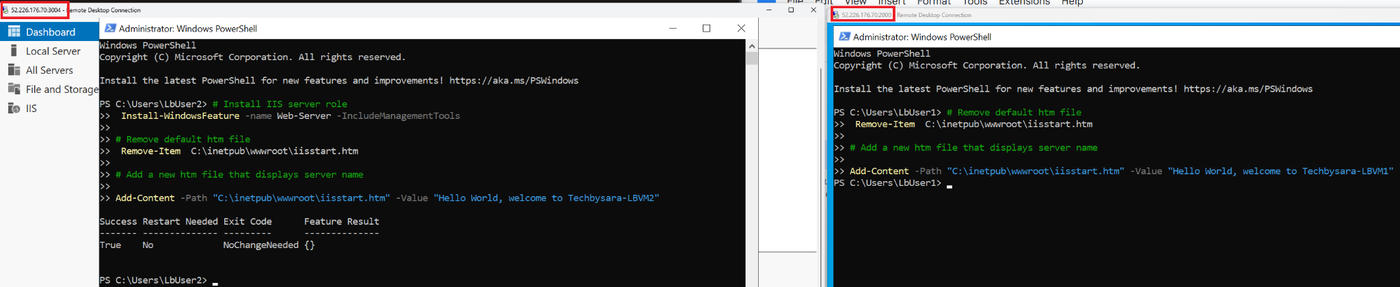
With the VMs up, I connected to each over RDP, installed IIS through PowerShell, and replaced the default iisstart.htm with a one-line file naming the VM, so I'd be able to tell at a glance which server actually answered a request:
Install-WindowsFeature -name Web-Server -IncludeManagementTools
Remove-Item C:\inetpub\wwwroot\iisstart.htm
Add-Content -Path "C:\inetpub\wwwroot\iisstart.htm" -Value "Hello World, welcome to LBVM1"
Once both VMs confirmed their custom page, I disassociated the public IPs from each one. From this point on, the load balancer is the only thing the outside world talks to.
Step 2: Create the load balancer
In the Azure portal, searching "Load Balancer" under Marketplace gets you to the create flow. The basics are straightforward: pick the resource group and region, name it, and choose Standard SKU with Public type and Regional tier.
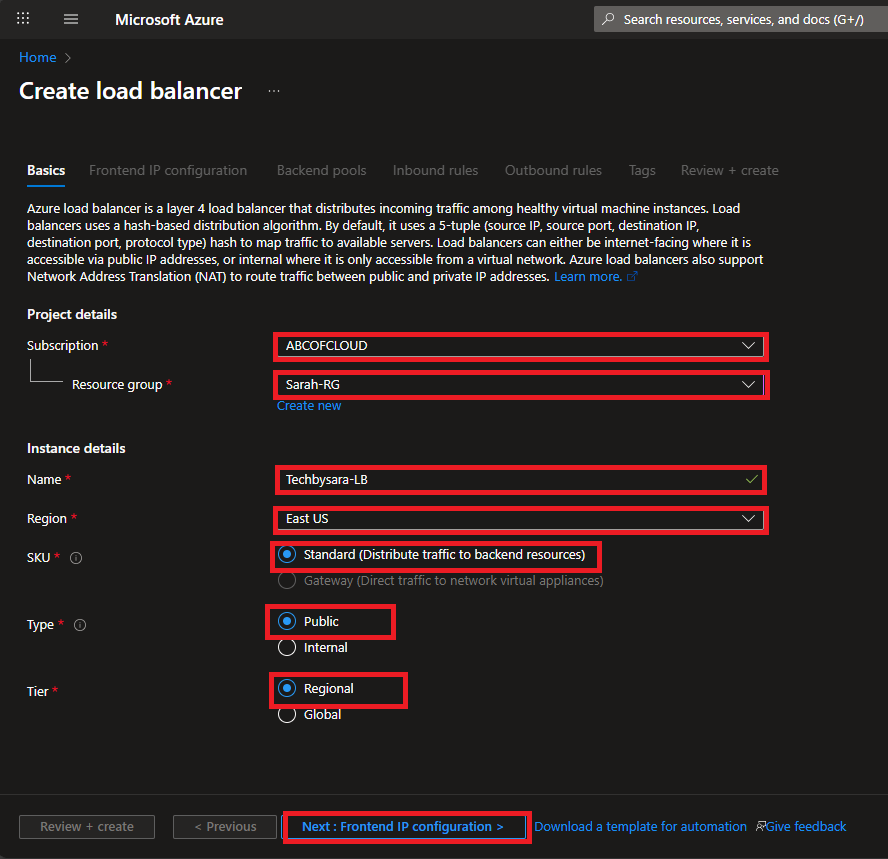
From there, the configuration happens in three parts:
Frontend IP configuration, the single public IP address clients will actually connect to.
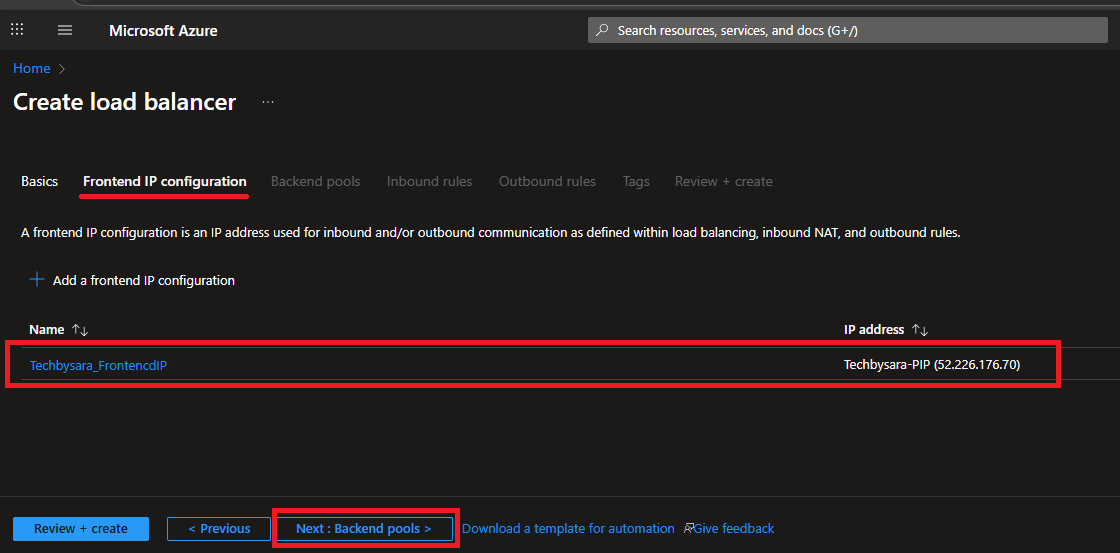
Backend pool, the VMs that will receive traffic. I selected NIC as the backend pool configuration and added both VMs, making sure everything sat in the same region and VNet as the load balancer itself.
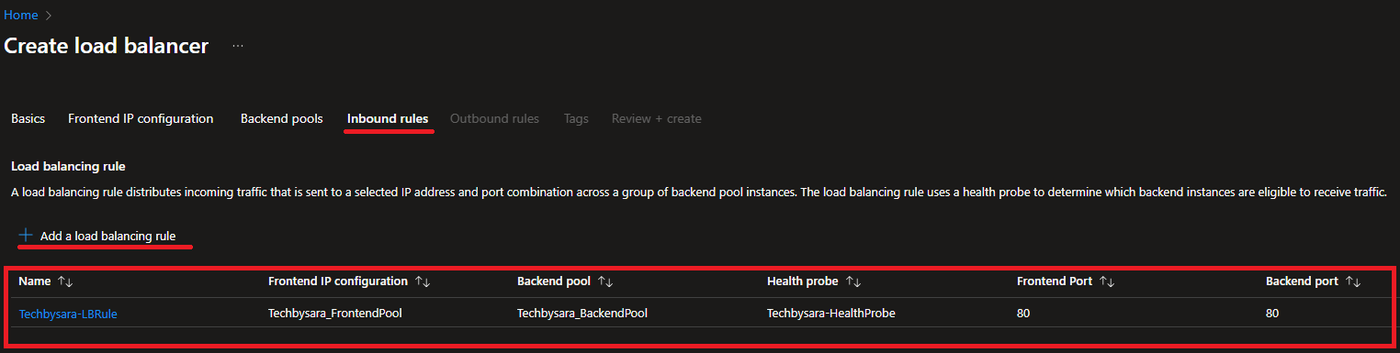
Inbound rules, this is where the actual load balancing rule lives, tying the frontend IP and backend pool together over TCP port 80, with a TCP health probe on the same port deciding which backend instances are actually eligible to receive traffic.
Step 3: Add inbound NAT rules for management
With the public IPs removed from each VM, I still needed a way to RDP into them individually for troubleshooting. That's what an inbound NAT rule is for: it maps a specific port on the load balancer's public IP to port 3389 on a single VM, so each server stays reachable without ever exposing its own public IP.
I gave each VM its own frontend port (2000 and 3004) mapped back to port 3389 on that VM, repeating the same steps for both.
A quick note on production use: exposing RDP to the internet like this, even through NAT, isn't something I'd recommend outside of testing. A VPN or Azure Bastion is the safer route for real environments.
Testing it
With everything created, I connected to each VM through its own NAT port (<load-balancer-public-ip>:2000 and :3004) to confirm both were reachable individually, then hit the load balancer's public IP on port 80 to confirm traffic was actually being distributed.
Both VMs responded, each identifying itself by name, confirming the health probe and load balancing rule were both doing their job.
That's the whole flow: prepare the network, stand up the load balancer, wire the frontend and backend together, layer in NAT rules for management, and test. If you want every click and screenshot along the way, including the full portal walkthrough for each step above, I put together the complete guide as a PDF.